context.fillStyle will set the color for all future fills such as
context.fillRect(). It's important to note theat context.fillStyle
is not a method, it is an attribute. You set it like so:
context.lineTo(x, y) creates a path from the current point - default (0,0) -
to the point (x, y). In order to see the line you must call context.stroke().
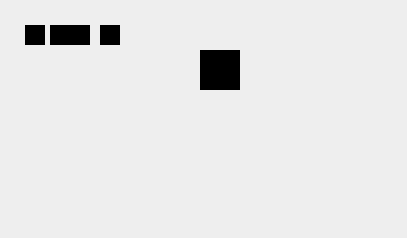
context.save() saves all of the properties of the context. Then, when you call
context.restore() it will reset all changes to the context you've made.
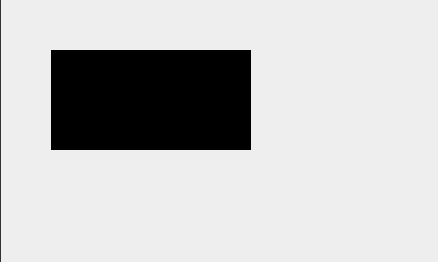
This code will produce the image below (note how the second rectangle is black
and closer to the original origin despite calling translate and setting the
fillStyle earlier):
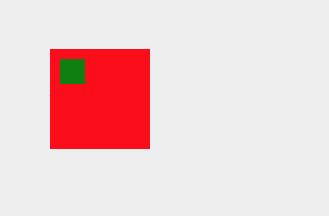
context.scale(percentX, percentY) scales the x and y coordinates of the context, making drawings
larger or smaller.
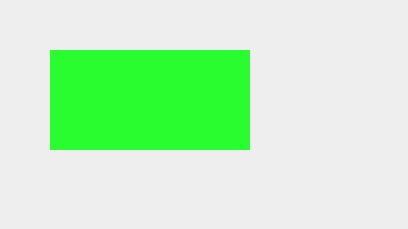
This code will produce the image below (note that all rectangles are defined to be the same size
in the code are drawn in different sizes due to the scale of the context):
context.translate(x, y) shifts the origin of the context (where the (0,0) point is)
right by x and down by y. This allows you to draw execute multiple commands in a specific
area of the context more easily.
This code will produce the image below (note how the fillRect commands are
relative to the translation point (100,100)):
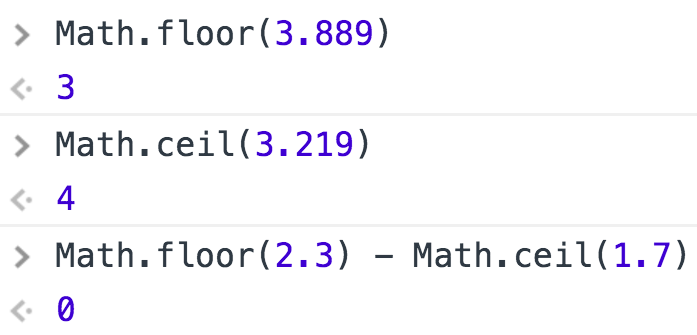
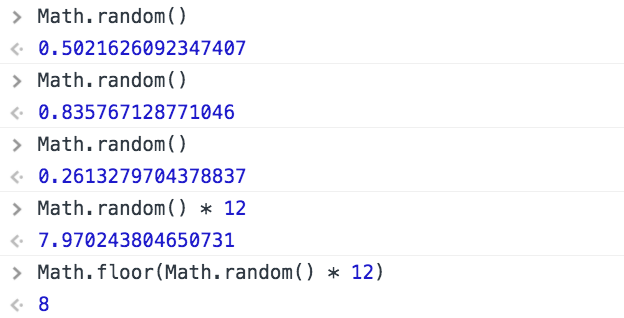
Math.round(), Math.floor() and Math.ceil() will round a number to an integer.
Math.floor() will always round down while Math.ceil() will always round up.
Math.round() will round to the closest integer, either up or down.
Math.random() will produce a random decimal betweek 0 and 1. Calling it many
times will produce a different random number each time.
Often you will multiple Math.random() by another number to get a random
integer larger than 1. You may also call Math.floor() or Math.ceil() on the result
to get an rounded integer.
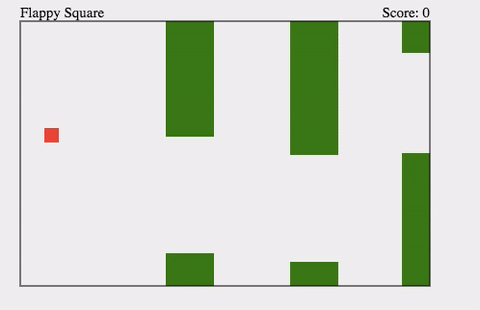
In the Flappy Square challenge we'll create a simplified version
of the popular mobile game,
Flappy Birds.
For our game we won't be creating any fancy graphics, we'll simply have
a square that flies when you click on the canvas with the mouse and falls when you
don't. You'll have to navigate through randomly generated walls in the course
by flying to the correct height to pass through the hole.
Stage 1 Overview
In the first stage of the Flappy Square challenge we'll focus
on drawing the basic elements of our game: the flappy square,
the boundary of the game, and one wall.
Lesson: The Coordinate System
Before we get started with our game it is important to understand
the coordinate system we'll be drawing in.
When drawing in the
coordinate system
on a canvas element (as seen to the right) the
"y" values go down.
Unlike with a normal graph, where the positive "y" values go up starting from the bottom, in the canvas
positive "y" values go down starting from the top.
So the point (50, 100) is 50 pixels from the right of the top left corner of the canvas and
100 pixels down from the top left corner.
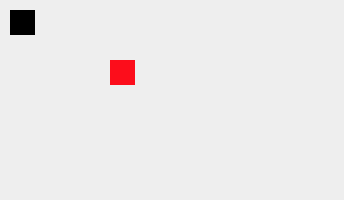
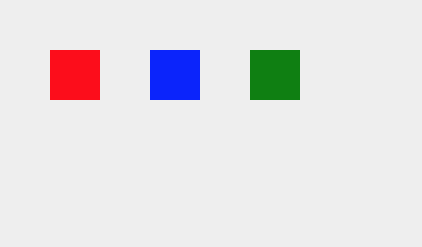
In the example below, we are drawing two squares that are
25 pixels wide and 25 pixels high
using the
context.fillRect(x, y, width, height)
method. The
black square is at (0, 0)
so it's top left corner is in the top left corner of the canvas. The
blue square is at (50, 100)
so it's top left corner is 50 pixels to the right and 100 pixels down.
Try adjusting the coordinates of the two squares and see how they move around
the coordinate system.
Important:This is a lesson, not a challenge.
It is here just to help you learn. Play around with it to see your code changes
affect the result. Scroll down for the first challenge.
Editor
(write code below)
var canvas = document.getElementById('flappy_square_stage1_lesson1');
var context = canvas.getContext('2d');
context.fillRect(0, 0, 25, 25);
context.fillStyle = 'blue';
context.fillRect(50, 100, 25, 25);
Message Log
This is a lesson, not a challenge, the code runs automatically.
But change it! Play with it! Click "Run" to see your changes.
Run
Run and Focus Canvas
Reset
Canvas
(your drawing will display here)
Challenge 1
Challenge 1 Sample Solution
Draw a rectangle using the
context.fillRect(x, y, width, height)
method where you replace x with the top left x coordinate, y with the top left y coordinate,
width with the width of the rectangle and height with the height of the rectangle.
Draw the rectangle so that it's top left corner is 90px down from the top of the canvas
and 60px over from the left of the canvas. The rectangle should be 60px tall (height) and
45px wide (width).
In the end your drawing should look like the example provided to the right.
var canvas = document.getElementById('flappy_square_stage1_challenge1');
var context = canvas.getContext('2d');
// YOUR CODE HERE
Message Log
This is a lesson, not a challenge, the code runs automatically.
But change it! Play with it! Click "Run" to see your changes.
Run
Run and Focus Canvas
Reset
Canvas
(your drawing will display here)
A Solution:
Here's the code I wrote to complete this challenge.
View One Possible Solution
var canvas = document.getElementById('flappy_square_stage1_challenge1');
var context = canvas.getContext('2d');
context.fillRect(60, 90, 45, 60);
Lesson: Draw The Flappy Square
In our game our flying square will be just that, a simple square.
In this example, we'll draw a simple square using
context.fillRect(x, y, width, height)
that is
50 pixels wide and 50 pixels tall.
We'll position it so that its
top left corner is at x = 100, y = 50: (100, 50).
Remember: In the context's
coordinate system
the origin (0, 0) is at the top left corner of the canvas.
Important:This is a lesson, not a challenge.
It is here just to help you learn. Play around with it to see your code changes
affect the result. Scroll down for the next challenge.
Editor
(write code below)
var canvas = document.getElementById('flappy_square_stage1_lesson2');
var context = canvas.getContext('2d');
context.fillRect(100, 50, 50, 50);
Message Log
This is a lesson, not a challenge, the code runs automatically.
But change it! Play with it! Click "Run" to see your changes.
Run
Run and Focus Canvas
Reset
Canvas
(your drawing will display here)
Challenge 2
Challenge 2 Sample Solution
Draw a flappy square that is
20 pixels wide and 20 pixels tall
and position it at
(50, 100).
In the end your flappy square should look like the example provided to the right.
var canvas = document.getElementById('flappy_square_stage1_challenge2');
var context = canvas.getContext('2d');
// YOUR CODE HERE
Message Log
This is a lesson, not a challenge, the code runs automatically.
But change it! Play with it! Click "Run" to see your changes.
Run
Run and Focus Canvas
Reset
Canvas
(your drawing will display here)
A Solution:
Here's the code I wrote to complete this challenge.
View One Possible Solution
var canvas = document.getElementById('flappy_square_stage1_challenge2');
var context = canvas.getContext('2d');
context.fillRect(50, 100, 20, 20);
Lesson: Using context.strokeRect()
We're going to want to create a "game area" for our game which
is essentially just a rectangle drawn within the canvas
that represents the valid area for the game to be drawn in.
But we don't want our square to be filled in, so
context.fillRect(x, y, width, height)
won't work. We'll need to use
context.strokeRect(x, y, width, height)
instead.
context.strokeRect(x, y, width, height)
works the same as
context.fillRect(x, y, width, height)
but doesn't fill in the space with any color.
The example below shows a simple example of using
context.strokeRect(x, y, width, height)
to draw a square on the canvas.
Previous Challenge:
View your
code from
Stage
1
Challenge
2
to use on this challenge.
Code Missing:
You have not yet entered any code in to the previous challenge:
Stage
1
Challenge
2
Stage
1
Challenge
2
Editor
(write code below)
var canvas = document.getElementById('flappy_square_stage1_challenge3');
var context = canvas.getContext('2d');
// YOUR NEW CODE FOR A GAME BOUNDARY
// YOUR PREVIOUS FLAPPY SQUARE CODE
Message Log
This is a lesson, not a challenge, the code runs automatically.
But change it! Play with it! Click "Run" to see your changes.
Run
Run and Focus Canvas
Reset
Canvas
(your drawing will display here)
A Solution:
Here's the code I wrote to complete this challenge.
View One Possible Solution
var canvas = document.getElementById('flappy_square_stage1_challenge3');
var context = canvas.getContext('2d');
context.strokeRect(25, 25, 425, 275);
context.fillRect(50, 100, 20, 20);
Challenge 4
Challenge 4 Sample Solution
Let's take a look at the walls in our game.
Eventually we'll need to create many walls, animate them, randomize them,
and track them to make sure that we are not running into the them.
Let's start, though, by simply creating one wall. We'll create one rectangle
that is attached to the roof of the game area with a matching rectangle on
the floor of the game area.
So try to draw two rectangles (a wall), one attached to the
roof (y = 25)
and one to the
floor (y = 300)
Each of them should be
100 pixels tall and 50 pixels wide.
We also don't want to draw our walls right on top of the flappy square
when the game starts, so let's draw this first one
125 pixels out
from the left boundary of the game.
Hint: you can make the computer do the calculations for you. For example:
context.fillRect(100 - 50, 100 + 50, 200, 200);
This would is essentially the same as writing
context.fillRect(50, 150, 200, 200);
In the end your flappy square should behave like the example provided to the right.
Previous Challenge:
View your
code from
Stage
1
Challenge
3
to use on this challenge.
Code Missing:
You have not yet entered any code in to the previous challenge:
Stage
1
Challenge
3
Stage
1
Challenge
3
Editor
(write code below)
var canvas = document.getElementById('flappy_square_stage1_challenge4');
var context = canvas.getContext('2d');
// CODE FOR YOUR GAME BOUNDARY
// CODE FOR YOUR FLAPPY SQUARE
// CODE FOR YOUR WALL
Message Log
This is a lesson, not a challenge, the code runs automatically.
But change it! Play with it! Click "Run" to see your changes.
Run
Run and Focus Canvas
Reset
Canvas
(your drawing will display here)
A Solution:
Here's the code I wrote to complete this challenge.
View One Possible Solution
There are a lot of numbers in our game and many of them are dependent on each other.
For example if we want to place our first wall 125 pixels from the left border
of our game area then it would be nice to be able to reference the left border
"x" position when we draw our first wall.
Variables allow us to store information and
reference / manipulate that information later.
Variable are a core concept in software development. If you feel uncertain about them
you should click on the "variables" quick reference button below and click on the
"Full Lesson" button in the pop-up.
In this example we use a variable to position a square
150 pixels
from a left hand border.
var canvas = document.getElementById('flappy_square_stage#stage_index_lesson4');
var context = canvas.getContext('2d');
var wallX = 50;
var wallY = 50;
var wallHeight = 200;
var squareX = wallX + 150;
var squareY = 100;
var squareSize = 50;
context.beginPath();
context.moveTo(wallX, wallY);
context.lineTo(wallX, wallY + wallHeight);
context.stroke();
context.fillRect(squareX, squareY, squareSize, squareSize);
Message Log
This is a lesson, not a challenge, the code runs automatically.
But change it! Play with it! Click "Run" to see your changes.
Run
Run and Focus Canvas
Reset
Canvas
(your drawing will display here)
Challenge 5
Challenge 5 Sample Solution
Use
variables
to capture the various aspects of your flappy square, boundary, and first wall.
Setting a variable looks like this:
var wallX = 25;
We've provided the variables for the boundaryand a placeholder
variable declarations for the flappy squre. You'll need to
write the variables for the wall.
As a reminder the flappy square should be positioned at
(50, 100)
and should be
20 pixels wide and 20 pixels tall.
Each section of the wall (top and bottom) should be
50 pixels wide and 100 pixels tall
and should be attached to the top and bottom of the boundary respectively.
To work with our variable effectively let's reposition our wall
100 pixels
from the left boundary instead of 125 pixels.
Variable are an important concept in coding. If you feel uncertain about them
you can find more information and exercise around functions by clicking on the "variables"
quick reference button below and then clicking on the "Full Lesson" button in the pop-up.
In the end your game should look like the image provided above.
Previous Challenge:
View your
code from
Stage
1
Challenge
4
to use on this challenge.
Code Missing:
You have not yet entered any code in to the previous challenge:
Stage
1
Challenge
4
Stage
1
Challenge
4
Editor
(write code below)
var canvas = document.getElementById('flappy_square_stage1_challenge5');
var context = canvas.getContext('2d');
var boundaryMinX = 25;
var boundaryMinY = 25;
var boundaryWidth = 425;
var boundaryHeight = 275;
var squareX = ;
var squareY = ;
var squareSize = ;
// WALL VARIABLES HERE
// CODE FOR YOUR GAME BOUNDARY
// CODE FOR YOUR FLAPPY SQUARE
// CODE FOR YOUR WALL
Message Log
This is a lesson, not a challenge, the code runs automatically.
But change it! Play with it! Click "Run" to see your changes.
Run
Run and Focus Canvas
Reset
Canvas
(your drawing will display here)
A Solution:
Here's the code I wrote to complete this challenge.
View One Possible Solution
var canvas = document.getElementById('flappy_square_stage1_challenge5');
var context = canvas.getContext('2d');
var boundaryMinX = 25;
var boundaryMinY = 25;
var boundaryWidth = 425;
var boundaryHeight = 275;
var squareX = 50;
var squareY = 100;
var squareSize = 20;
var wallX = boundaryMinX + 100;
var wallWidth = 50;
var wallHeight = 100;
context.strokeRect(boundaryMinX, boundaryMinY, boundaryWidth, boundaryHeight);
context.fillRect(squareX, squareY, squareSize, squareSize);
context.fillRect(wallX, boundaryMinY, wallWidth, wallHeight);
context.fillRect(wallX, boundaryMinY + boundaryHeight - wallHeight, wallWidth, wallHeight);
Challenge 6
Challenge 6 Sample Solution
A best practice in coding is to try and not repeat yourself.
One of the most powerful aspects of coding is how you can create
structures of information and functionality that can be reused
in different ways.
In our code right now are variables look very similar:
var boundaryMinX = 25;
var boundaryMinY = 25;
var boundaryWidth = 425;
var boundaryHeight = 275;
Those four variable declations all repeat the word "boundary".
Instead we could use a hash, which is a way to store information,
to collect all of these variables together.
Previous Challenge:
View your
code from
Stage
1
Challenge
5
to use on this challenge.
Code Missing:
You have not yet entered any code in to the previous challenge:
Stage
1
Challenge
5
Stage
1
Challenge
5
Editor
(write code below)
var canvas = document.getElementById('flappy_square_stage1_challenge6');
var context = canvas.getContext('2d');
var boundary = {
// SET THE DETAILS OF YOUR BOUNDARY HASH HERE
};
// SQUARE HASH HERE
// WALL HASH HERE
// CODE FOR YOUR GAME BOUNDARY
// CODE FOR YOUR FLAPPY SQUARE
// CODE FOR YOUR WALL
Message Log
This is a lesson, not a challenge, the code runs automatically.
But change it! Play with it! Click "Run" to see your changes.
Run
Run and Focus Canvas
Reset
Canvas
(your drawing will display here)
A Solution:
Here's the code I wrote to complete this challenge.
View One Possible Solution